Thunderbird: Difference between revisions
| Line 5: | Line 5: | ||
# Click '''File''', '''New''', then the '''Existing Mail Accounts option''' | # Click '''File''', '''New''', then the '''Existing Mail Accounts option''' | ||
# Fill out the following fields:<br/>[[File:ThunderbirdAddressConfig1.png|alt=|Address Settings]] | # Fill out the following fields:<br/>[[File:ThunderbirdAddressConfig1.png|alt=|Address Settings]] | ||
## '''Your Name''' - Enter your name here | ##'''Your Name''' - Enter your name here | ||
## '''Email Address''' - Enter your Bravenet e-mail address | ## '''Email Address''' - Enter your Bravenet e-mail address | ||
## '''Password''' - Enter the password for the Bravenet e-mail address | ## '''Password''' - Enter the password for the Bravenet e-mail address. | ||
# Click '''Continue''' | ## Click '''Continue.''' | ||
# Click on '''Configure manually'''<br/>[[File:ThunderbirdAddressConfig2.gif|alt=| Server Settings]] | ## Click on '''Configure manually'''<br />[[File:ThunderbirdAddressConfig2.gif|alt=| Server Settings]] | ||
## In the '''Username''' field, replace the contents with your full Bravenet e-mail address | ## In the '''Username''' field, replace the contents with your full Bravenet e-mail address | ||
## Change the Incoming '''Server Hostname''' to mail.bravehost.com | ## Change the Incoming '''Server Hostname''' to mail.bravehost.com | ||
Revision as of 11:49, 30 May 2022
Thunderbird is a free, open source email client developed by the Mozilla Foundation.
Configuring Thunderbird for your Bravenet Account
- Start Thunderbird
- Click File, New, then the Existing Mail Accounts option
- Fill out the following fields:
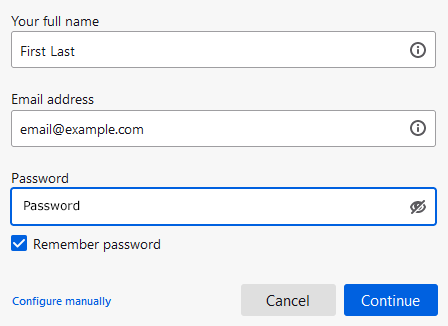
- Your Name - Enter your name here
- Email Address - Enter your Bravenet e-mail address
- Password - Enter the password for the Bravenet e-mail address.
- Click Continue.
- Click on Configure manually
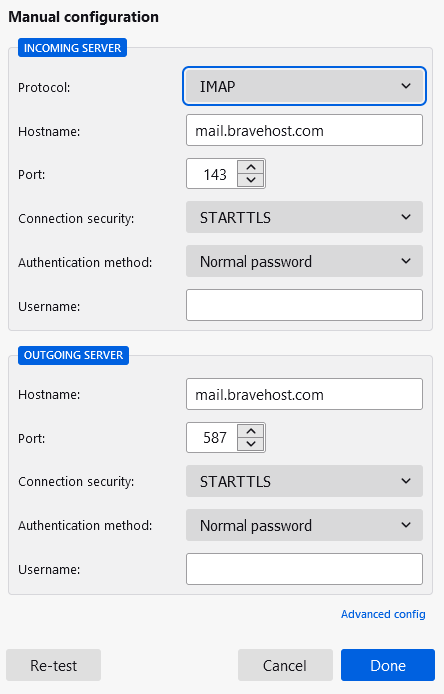
- In the Username field, replace the contents with your full Bravenet e-mail address
- Change the Incoming Server Hostname to mail.bravehost.com
- Change the Outgoing Server Hostname to mail.bravehost.com
- Click on Re-test to finish configuring the servers.
- Click the Done button and your account should now work correctly.


You can test your incoming and outgoing mail settings by sending yourself an email.