How to use FileZilla
FileZilla is a popular, free File Transfer Protocol program and relatively easy to use. It is completely free for use and can be downloaded from https://filezilla-project.org/ at any point.
Setting up SFTP
Before you can connect to any of your Bravenet services through a File Transfer Protocol, you will have to ensure you have SFTP setup on your Bravenet account first.
- 1) First, log into your Bravenet user account at www.bravenet.com.
- 2) Click the SFTP Accounts tab from the top of any Bravenet.com page.
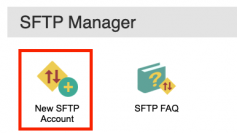
- 3) If you have no SFTP accounts created, select the "New SFTP Account" button.
- 4) Fill in a username and secure password in the popup box.
- 5) Optionally navigate to a path for this FTP account. This is the directory on the webserver the FTP account will open into by default. If left blank, it's path will be the root directory of your Bravenet account, giving it access to all websites and logfiles within that account.
- 6) Note: We urge users to not use Legacy FTP, and create and use only SFTP accounts.
- 7) When done, press the create sftp account button to finalize the SFTP account.
Congratulations, you now have an SFTP account that you can use to connect to your website with!
Connecting using FileZilla
- 1) Launch the FileZilla program on your local computer.
- 2) Click the File > Site Manager... buttons from the toolbar.
- 3) Either click on New Site or modify the settings for the current entry.
- 4) Use the Server/Hostname value from your Bravenet FTP tab in the FileZilla Host field, this is the hostname of your FTP server that you wish to connect to.
- 5) Set the FileZilla Protocol to SFTP - SSH File Transfer Protocol.
- 6) Ensure that Logon Type is set to Normal.
- 7) Fill the FTP server's username into the FileZilla User field.
- 8) Type the password for the FTP account in the Password field.
- 9) Click on Connect to proceed.
Using FTP File Transfer
Direct support and assistance with use of FileZilla's software must be provided directly by FileZilla themselves.
Once you have FileZilla setup and have a connection made with an FTP account you can connect to it. The program will then be divided into approximately two halves; the left half, labelled "Local site" or similar represents your local machine. The right pane represents the remote machine, or FTP server, that you have connected to, labeled "Remote site".
You may navigate through the files of either computer, until you have found the folders you want. File transfers are affected by uploading/downloading it from the source folder on one machine to the destination folder on another machine. You can both upload from your local machine to the FTP server, and download from the FTP server to your local machine. You can also create, edit, and destroy folders on the remote machine from an FTP connection, allowing you to reorganize your folder and directory structure. Note that some folders can't be modified in certain ways, dependent on the permissions set on them.
When you're done affecting your desired file transfers, you may close the connection by simply exiting out of the program itself.
Explicit vs Implicit FTPS
FTPS (SSL/TLS) is served up in two incompatible modes. If using explicit FTPS, the client connects to the normal FTP port and explicitly switches into secure (SSL/TLS) mode with "AUTH TLS", whereas implicit FTPS is an older style service that assumes SSL/TLS mode right from the start of the connection (and normally listens on TCP port 990, rather than 21). In a FileZilla client this means prefixing the host with "FTPES://" to connect an "explicit" FTPS server, or "FTPS://" for the legacy "implicit" server (for which you will likely also need to set the port to 990).


